You may have service contracts with your clients to provide them assistance in case of a problem. For this purpose, Odoo will help you record the time spent fixing the issue and most importantly, to invoice it to your clients.
The modules needed
In order to record and invoice time for tickets, the following modules are needed : Helpdesk, Project, Timesheets, Sales. If you are missing one of them, go to the Apps module, search for it and then click on Install.
Get started to offer the helpdesk service
Step 1 : start a helpdesk project
To start a dedicated project for the helpdesk service, first go to and make sure that the Timesheets feature is activated.

Then, go to your dashboard, create the new project and allow timesheets for it.
Step 2 : gather a helpdesk team
To set a team in charge of the helpdesk, go to and create a new team or select an existing one. On the form, tick the box in front of Timesheet on Ticket to activate the feature. Make sure to select the helpdesk project you have previously created as well.

Step 3 : launch the helpdesk service
Finally, to launch the new helpdesk service, first go to and make sure that the Units of Measure feature is activated.

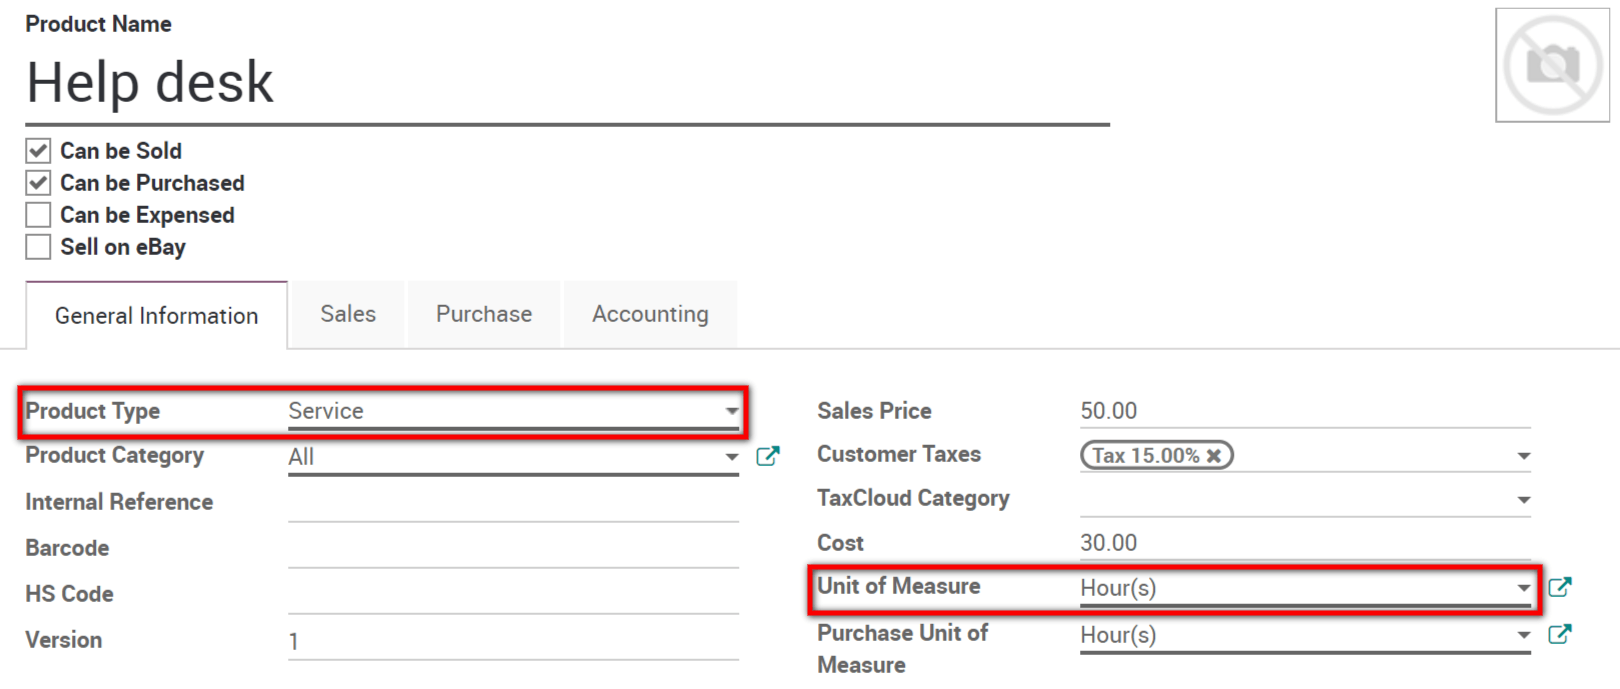
Then, go to and create a new one. Make sure that the product is set as a service.
Nota
Here, we suggest that you set the Unit of Measure as Hour(s), but any unit will do.
Finally, select the invoicing management you would like to have under the Sales tab of the product form. Here, we recommend the following configuration :
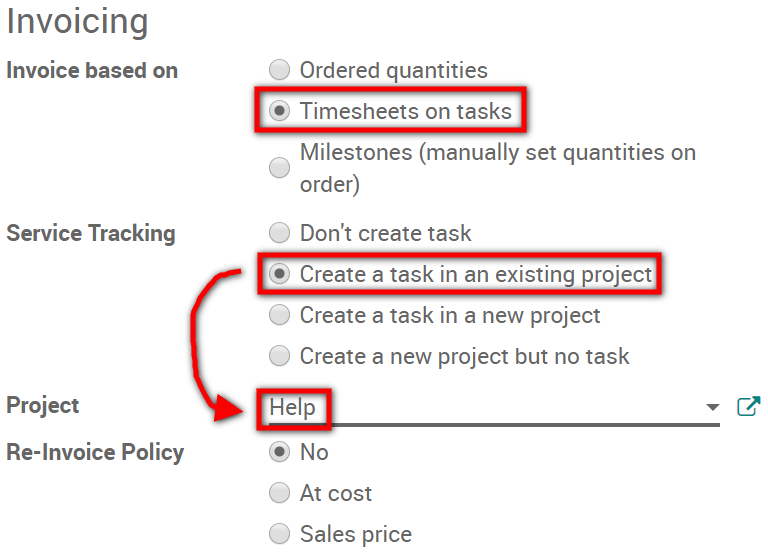
Now, you are ready to start receiving tickets !
Solve issues and record time spent
Step 1 : place an order
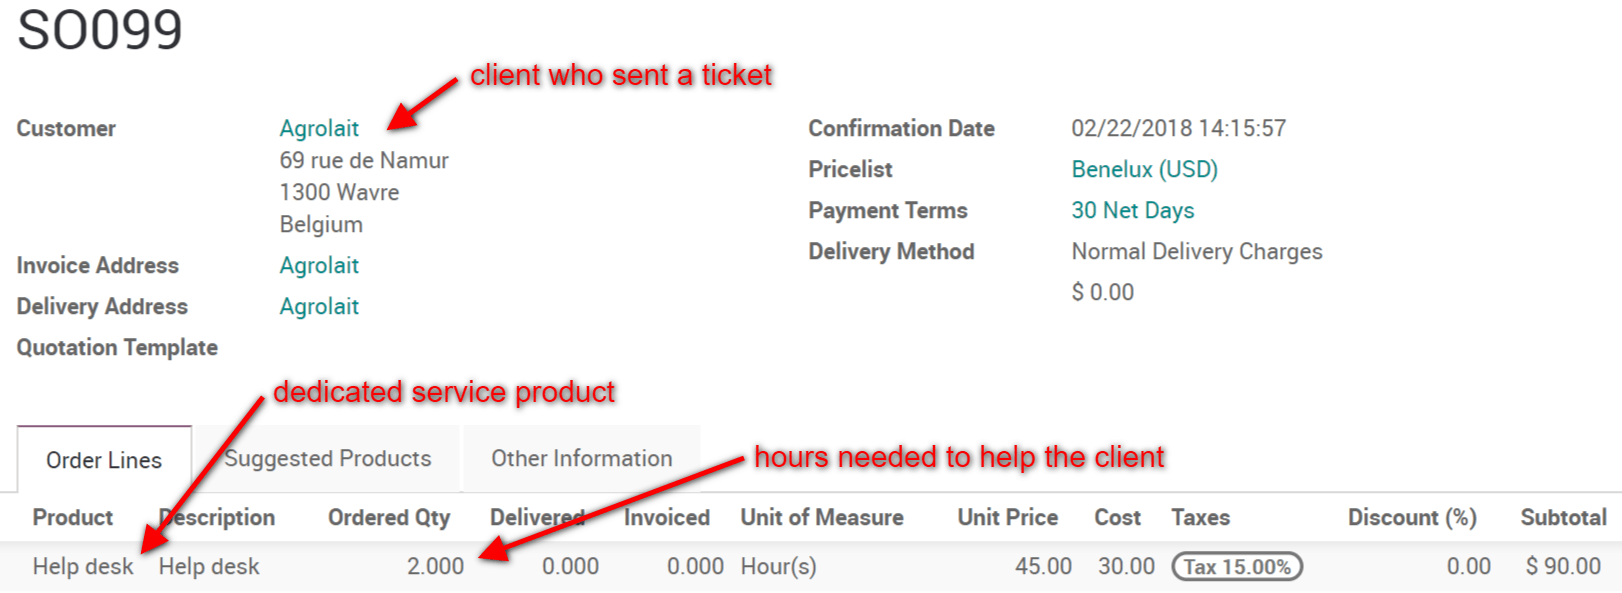
You are now in the Helpdesk module and you have just received a ticket from a client. To place a new order, go to and create one for the help desk service product you have previously recorded. Set the number of hours needed to assist the client and confirm the sale.
Step 2 : link the task to the ticket
If you access the dedicated helpdesk project, you will notice that a new task has automatically been generated with the order. To link this task with the client ticket, go to the Helpdesk module, access the ticket in question and select the task on its form.

Step 3 : record the time spent to help the client
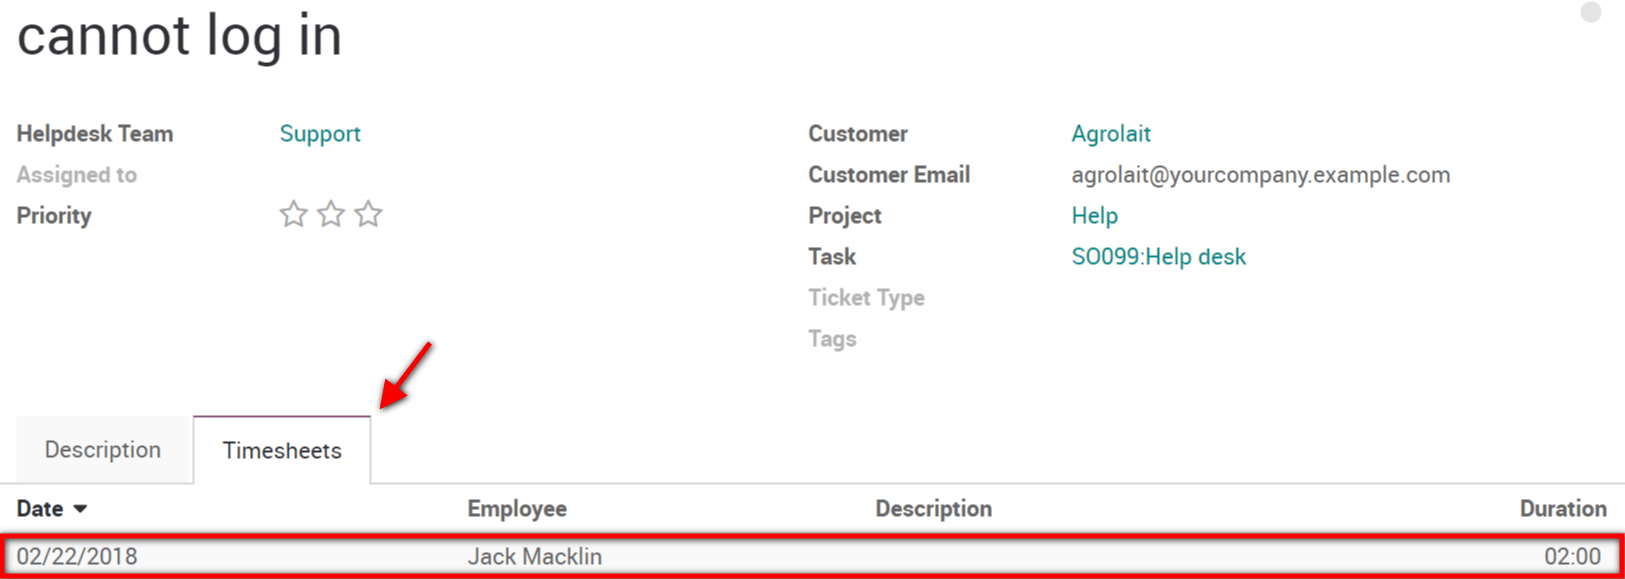
The job is done and the client's issue is sorted out. To record the hours performed for this task, go back to the ticket form and add them under the Timesheets tab.
Truco
The hours recorded on the ticket will also automatically appear in the Timesheet module and on the dedicated task.
Paso 4 : Factura de cliente
To invoice the client, go back to the Sales module and select the order that had been placed. Notice that the hours recorded on the ticket form now appear as the delivered quantity.
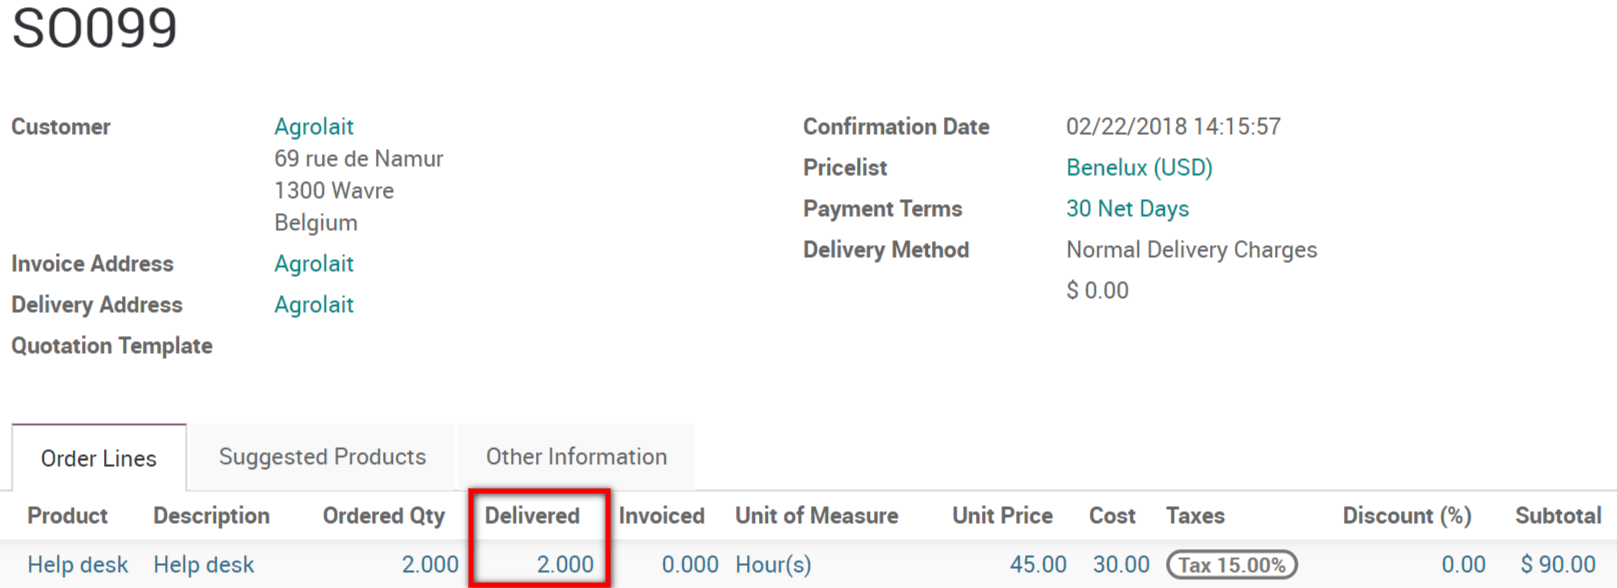
All that is left to do, is to create the invoice from the order and then validate it. Now you just have to wait for the client's payment !